こんにちは、エンジニアのオオバです。
Blender2.8で切れ目を入れてUV展開する方法
前回Blender2.8でUV展開しました。その続きです。
今回はテクスチャを貼ってみます。

Propertiesウィンドウを使う

今回初めてPropertiesウィンドウを使います。

PropertiesウィンドウのBase Colorの丸ポチ部分をクリックします。
拡散光に画像をセットする

Image Textureを選択します。

Openをクリックして画像ファイルを選択します。

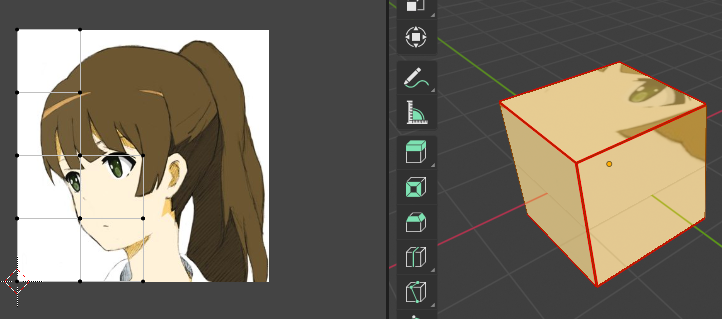
メニューからUV Editingを選択して、展開したUV上に画像が表示されます。
完成

すると、このようにテクスチャが貼られます。
この記事が気に入ったら
筆者のXをフォローしよう
筆者のXをフォローしよう
オススメ記事